Working with SMTP Servers
To set up an SMTP server connection, you will need four pieces of information: your Host, your Username, your Password, and your SMTP Port.
To setup a password protected SMTP server connection:
- Open the SMTP servers manager — on the ribbon, choose Report Viewer › View › Settings (see Managing SMTP servers).
- Click the New button. The SMTP Server dialog box will appear.
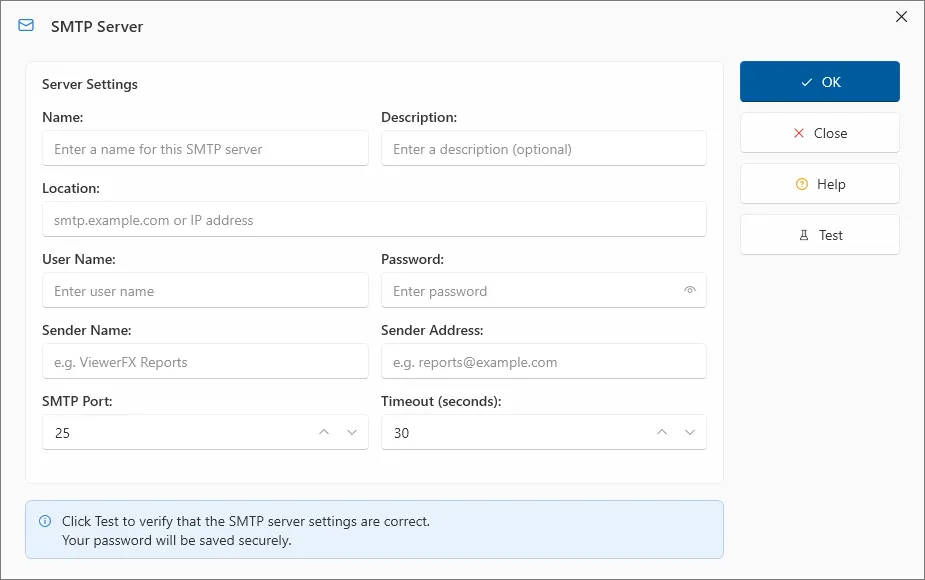
- In the “Name” field, type in any name by which you would like to refer to this connection.
- In the optional Description field, type in a meaningful description that describes this connection.
- In the “Location” field, type in the domain name of the SMTP Server (e.g. smtp.domain.com or just domain.com) or IP address (e.g. 192.168.10.119) as was given to you by your Web hosting provider.
- In the User name and Password fields, type in whatever security information was provided by your Web hosting provider. Note: To connect anonymously leave these fields blank.
- In the “Sender Name” field, type your full name the way that you want it to appear to other people (e.g. John Doe).
- In the “Sender Address” field, type your return email address the way that you want it to appear to other people (e.g. john.doe@domain.com).
- The SMTP Server port and timeout settings are defaulted to the commonly used values for this type of connection. If your Web hosting provider uses other settings than the default, change them to the appropriate values provided by your provider.
- To test the provided connection settings, click Test.
- Click OK. A new SMTP Server connection will be created.