Working with Parameters
To set up a custom date parameter, you’ll need to decide how you want your final output to look. There are several options available to define a parameter.
Note: This page covers creating reusable custom date parameters. To enter a report’s own parameter values when you open or refresh it — including dynamic list-of-values and multi-value parameters — see Connection and data-source settings.
To setup a custom parameter:
- Open the custom parameters manager — on the ribbon, choose Report Viewer › View › Settings (see Managing custom parameters).
- Click the New button. The Custom Parameter dialog box will appear.
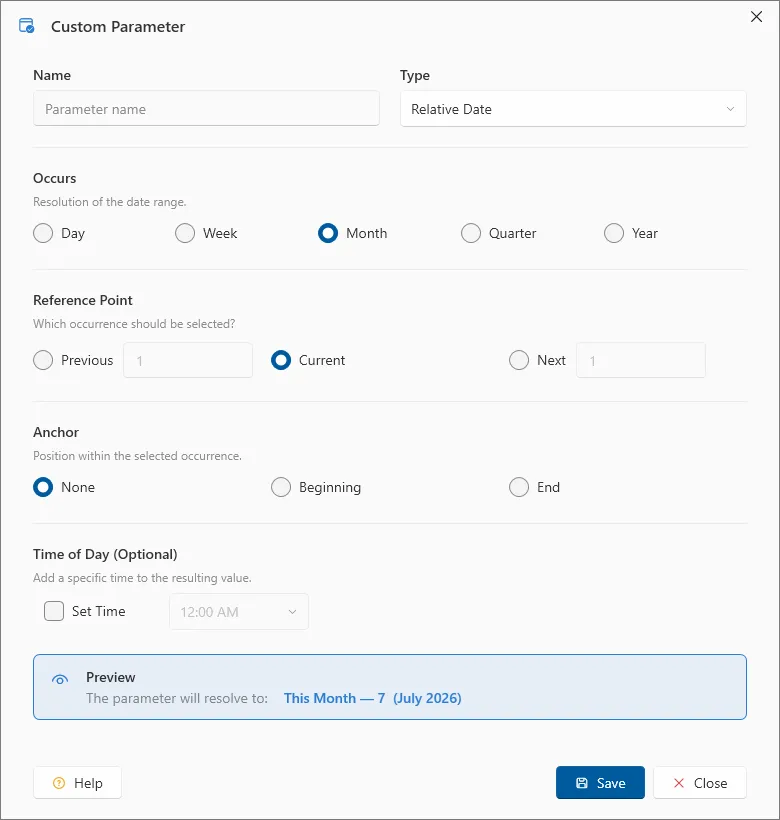
- In the “Name” field, type in any name by which you would like to refer to this parameter.
- In the Type field, select the output format of the parameter.
- Date Literal: Date literal parameters output a date in standard date notation (e.g. 1/1/2008 or 1/1/2008 11:30 AM).
- Date Value: Date value parameters output a whole number (e.g. 1).
- In the “Occurs” field, select Day, Week, Month, Quarter, or Year. This will change the heading of the Increment option group to the corresponding selection (e.g. When Day is selected in the Occurs option group, the Increment option group will display Day as its header).
- In the Increment field, select Previous, Current, or Next. This will define the increment (positive or negative) to apply to the date.
- In the “Timing” field, select None, Start of the, or End of the. This option allows defining dates that start at the beginning or end of a period (e.g. Today’s date: 2/23/2008, Type = Date Literal, Occurs = Month, Increment = Current, Timing = Start of the month, Output = 2/1/2008). The Time checkbox appends the time to the outputted date when checked. The Time option is gated by the parameter type: selecting a relative date type disables the Time controls, because a relative date cannot carry a time.
- To test the provided custom parameter, click Test.
- Click OK. A new custom parameter will be created.